Sunday 4 May 2014

Spaghetti Squash with tomatoes and spinach

Now that the snow has finally gone I love having easy and fresh meals for dinner, though this makes for a great lunch too! You can use any veggies that you have in your fridge that you need to get rid of or that you love. Spaghetti squash is a great alternative to pasta for those that can't or don't want to eat white pastas. My boyfriend loves his white pastas, but I cannot eat it and he is not the biggest fan of the alternative pastas out there. The squash cooks fairly quickly and there is not a lot of prep work involved. So don't worry it won't take longer then making your favourite pasta. Plus, you will get the added nutrition of eating a veggie instead of a grain, that is really not that great for you (white pasta!).

1 spaghetti squash
1 pt of cherry tomatoes
1-3 gloves of garlic, minced
1-3c cups of spinach
Salt and pepper, to taste

Preheat oven to 350 degrees. Cut squarish lengthwise and scoop out seeds. Place both squash halves onto a baking sheet face down and add enough water so it site one cm from where the squash touches the pan. You can also wait and do this step after you have place squash in the oven to avoid spilling the water. Place squash in over for 40-45 minutes or until you can stick a fork in it.


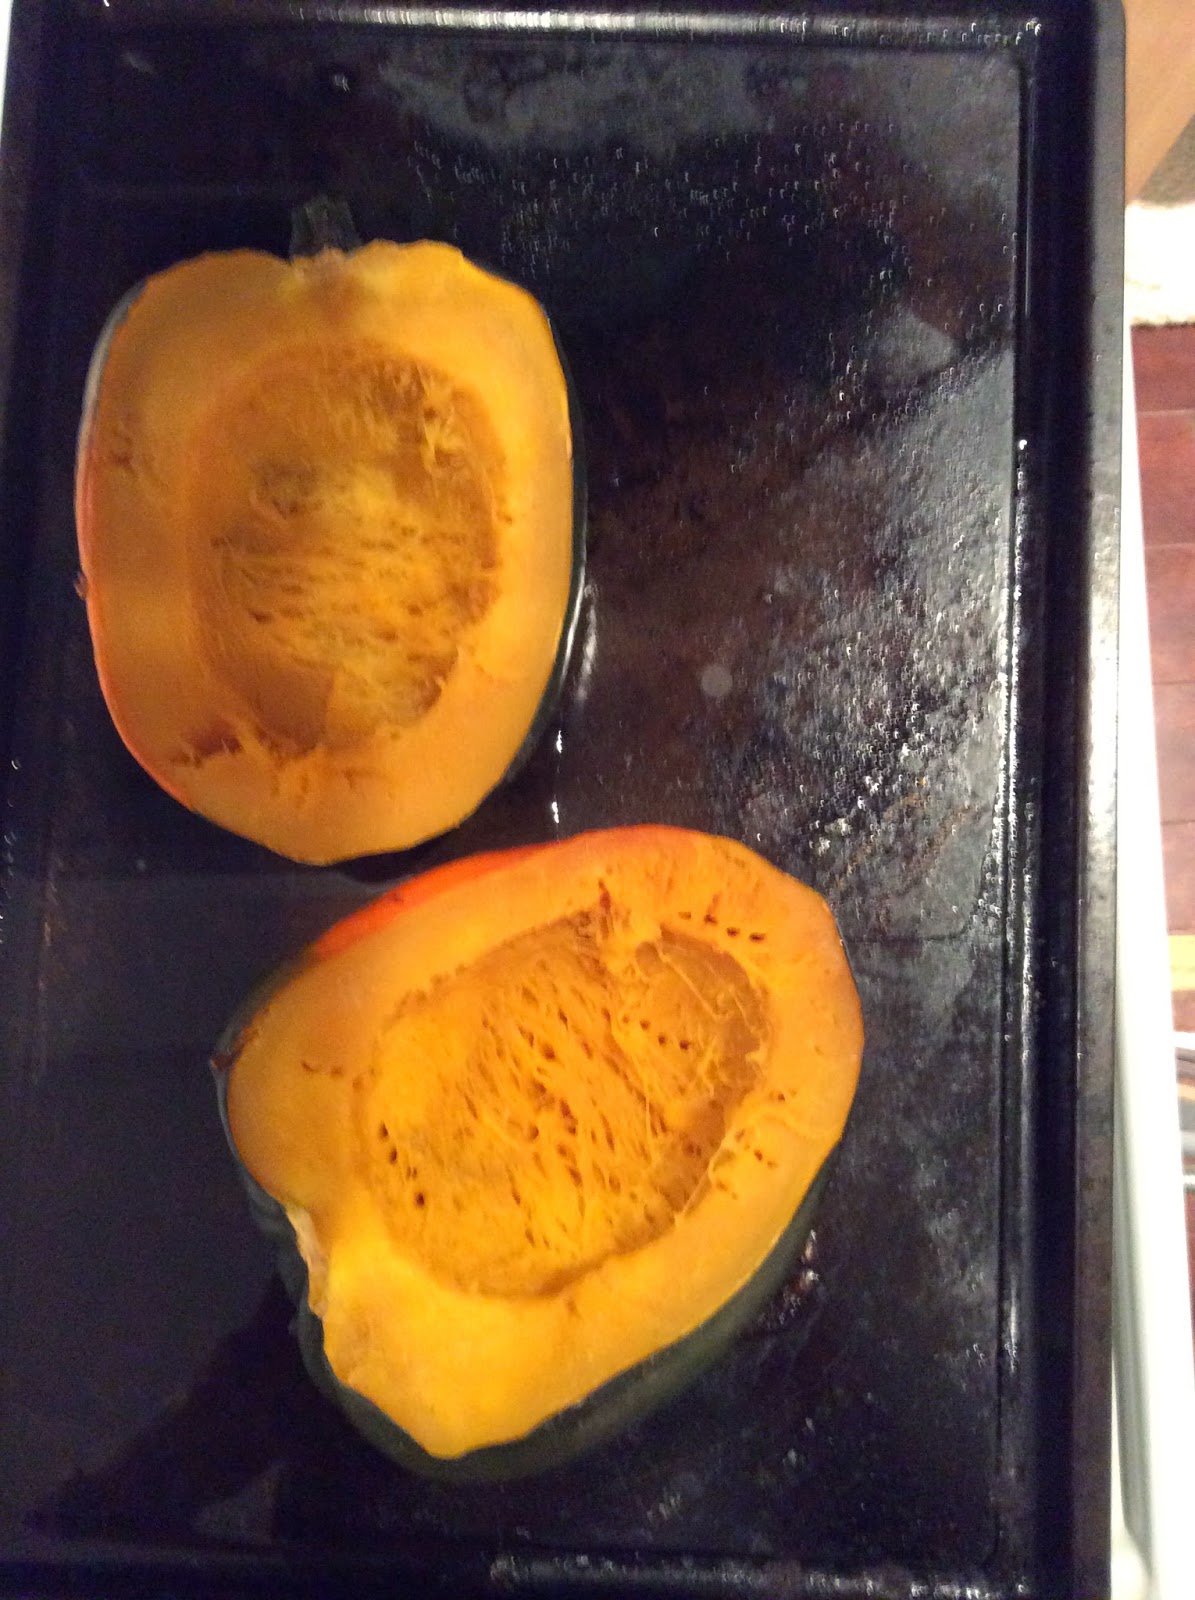
Take squash out of the oven and turn both pieces over to expose the delicious flesh. Let cool while you prepare other ingredients.


Cut tomatoes in half and place in a preheated pan with a bit of oil and the garlic.

 Meanwhile using a fork scrape the insides of the two squash pieces until you have spaghetti like 'noodles'. Cook tomatoes until they are just starting to break down and add the spinach, salt and pepper.


Stir until the spinach is wilted and add squash.


I like to add a little bit of 'cheese', additional other toppings are nutritional yeast, hot sauce, or fresh herbs like basil, parsley or rosemary.


Enjoy!

M


Easy Rice Rolls with Dipping Sauce

I have been told that I need to start snacking. More important that I need to have protein in my snacks. Eating the same thing can be a tad boring, or it is for me. To alleviate my boredom (don't get me wrong I love a crisp apple with almond butter!) I started to experiment with ingredients I am unfamiliar with. Rice wrappers are inexpensive and super easy to use. Plus they have the added bonus of being a vehicle for lots of tasty ingredients!

3 rice wrappers (individually soak in warm water until they are pliable and want to stick together)
Carrot pieces
Tofu pieces
Lettuce pieces

Dipping Sauce
Soy sauce
Dash of sesame seed oil

Prepare one rice wrapper at a time and lay flat on a plate or board.  Place a few piece of each ingredient in the centre of you rice wrapper. Then fold in all four ends (they should stick together). Repeat process with other two rice wrappers.

For dipping sauce place both ingredients in a small bowl and stir together.


Super easy and quick when you are needing a small snack to get to through your afternoon.

Enjoy!

M

Calling all Salad lovers!

I have been eating a ton of salads lately! It is a bit intense, but good if you mix it up. The best part you can add as much or as little of each ingredient depending on how much you have or how much you like each ingredient. They are superego easy, quick to make and very satisfying!

Miso Salad

Lettuce/spinach mix
Nori pieces
Sweet potato (cut in rounds and cooked)
Tofu strips (cooked)
Snap peas

Delicious Miso Dressing
1 tsp white miso
1 tsp sesame seed oil
1 tsp rice vinegar
Dash of molasses (for sweetness)
1 tsp coconut milk (if you feel it needs a little more liquid)


Throw ingredients in a small bowl and whisk with fork. Pour over salad:)

Hodgepodge Salad

Lettuce
Nori pieces
Pear
Coconut Curry Tempeh (4 pieces, cooked)
Sweet potato pieces (leftover from Easter dinner)
Walnuts
Miso dressing


You can put anything you like into your salad. Experiment! You never know what awesome combo that you will stumble upon.

Enjoy!

M

Sunday 12 January 2014

Homemade Almond Milk

Making your own almond milk is inexpensive and surprisingly easy.  It just requires a little planning in order to benefit from the simple ingredients, minimal sugar, and delicious taste!

1 cup almonds
4 cups water, plus water to cover almonds
Maple syrup, agave nectar or other sweetener to taste
Vanilla to taste

Place almonds in a bowl and cover with water.  Allows almonds to sit in water for a minimum of 2 hours or over night. Overnight is best should you have the time as it allows for a better breakdown of the almonds. Drain the almonds and place them in a blender and add 4 cups of water.  Blend until the almonds are a pulp.  Use a find mesh strainer to drain the Drain the liquid into a medium sized bowl.


Rinse out the blender and place the liquid back in the blender.  Add the sweetener and vanilla and blenr for a few moments.  

Pour the liquid in a glass jug or container.  The "milk" will keep for three days in your fridge. 


To make chocolate almond milk, add 2-3 tsp of cocoa and more sweetener to taste to the above. This is a nice change to regular almond milk and a nice treat warmed up on cold winter days!


Enjoy!

M